enable Volte Chack
*#*#86583#*#*
enable
*#*#4636#*#*
Eanable vowifi
*#*#869434#*#*
Testmenu
*#*#4636#*#*
วันจันทร์ที่ 6 สิงหาคม พ.ศ. 2561

วันศุกร์ที่ 20 กรกฎาคม พ.ศ. 2561
How to Reset Your Surface Using USB Recovery Drive
How to Reset Your Surface Using USB Recovery Drive
In this article, we will walk you step-by-step through how to create a USB recovery drive, loading recovery image, and resetting your Surface using the USB recovery drive.
Microsoft Surface lineup made an easy for users to recover their devices in case something went wrong by included a recovery partition on every model. However, in case you can’t reset your Surface with existing recovery partition, you can use a USB recovery drive instead.
To create a recovery drive, you will need to download recovery image for your from Microsoft Support website. To learn more how to download a right recovery image for your Surface device, please check this article How to download official recovery image for Microsoft Surface.
1 How to Create USB Recovery Drive
Before you can your USB drive as a USB recovery drive, you will need to use a built-in tool called “Create a recovery drive” to prepare your USB drive ready for booting. To do so.
Important All USB recovery drives must be formatted to FAT32 prior to loading a recovery image. For Surface RT and Surface 2, you will need at least 8 GB USB drive, while other models required at least 16GB USB drive for loading the image.
- Connect your USB drive to your Surface.
- Go to Start and type recovery. Select “Create a recovery drive”.

- Make sure you uncheck the “Backup system files to the recovery drive” option and click Next.

- Select your USB drive, and click Next.

- Click Create.

- It will take a few minutes to finish creating a recovery drive, after finish click Finish.
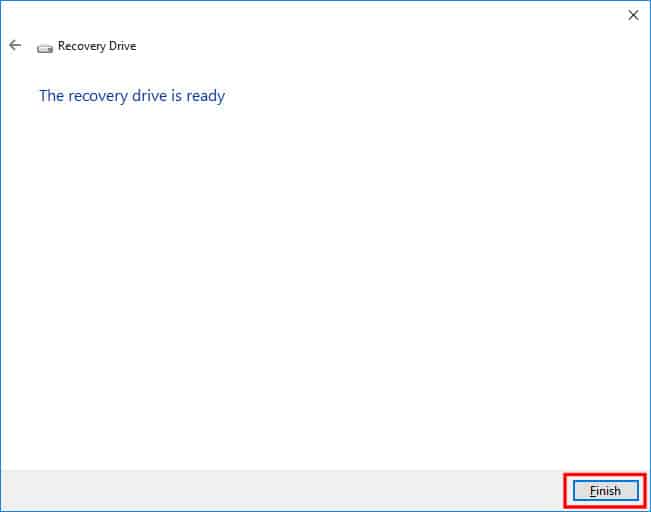
- Now you will see your USB recovery drive labeled as “RECOVERY” in File Explorer.

2 Copying Recovery Image Files to Your USB Recovery Drive
After you finish creating a Recovery Drive, you will need to copy your Surface’s recovery image content to the drive by:
Note If you don’t have the recovery image for your Surface yet, please check out our guide on how to download official recovery image for Microsoft Surface here.
- Open “File Explorer”.
- Open your downloaded Surface Recovery Image with the extension “.zip” with File Explorer.
- Select all items and drag them to the newly created USB recovery drive.

- You will need to confirm to replace the files in destination.

- Now your USB recovery drive is ready to use to reset a Surface to its factory settings.
3 Resetting a Surface Using a USB Recovery Drive
After you created a USB recovery drive with all recovery image files, now you can use it to recover your Surface to its factory settings. To do so:
- Shut down your Surface.
- Connect your USB recovery drive to the Surface that you want to reset.
- Press and hold the Volume Down button on your Surface, then press and release the Power button.
- When you see the Surface logo screen appear, release the Volume Down button.

- If you do it right, you will see the language options below, select your preferred language.

- Select a keyboard layout.

- Select Troubleshoot.

- Select Recover from a drive

- Select Fully clean the drive, if you want your Surface to have everything like its factory settings including hard drive partition layout.

- Click Recover to confirm recovering.

- Now your Surface will reboot and start recovering process.

- After finishing recovering your Surface, it will ask you to clear information stored on the TPM chip. Press F12 if you have type cover attached, otherwise press Volume Up button to confirm erasing.

- After it finishes clearing the TPM and it will reboot and take you to set up your Windows.

วันพุธที่ 18 กรกฎาคม พ.ศ. 2561
static ubuntu 18.04
Configuring Static IP Addresses With Networkd
To configure a static IP address using the new NetPlan tool, the file should look like this: IPv4 address (192.168.1.2), Gateway (192.168.1.1), DNS Servers (8.8.8.8,8.8.4.4)
Run the commands below to create a new network configuration file
sudo nano /etc/netplan/01-netcfg.yaml
Then configure IPv4 addresses as shown below… take notes of the format the lines are written…
# This file describes the network interfaces available on your system
# For more information, see netplan(5).
network:
 version: 2
 renderer: networkd
 ethernets:
   ens33:
     dhcp4: no
     dhcp6: no
     addresses: [192.168.1.2/24]
     gateway4: 192.168.1.1
     nameservers:
       addresses: [8.8.8.8,8.8.4.4]
Exit and save your changes by running the commands below
sudo netplan applyวันพุธที่ 11 กรกฎาคม พ.ศ. 2561
Enable Password Mysql
MySQL: Grant **all** privileges on database
grant all privileges on mydb.* to myuser@'%' identified by 'mypasswd';
grant all privileges on mydb.* to myuser@localhost identified by 'mypasswd';
on MariaDB server, the file may live belowsudo nano /etc/mysql/mariadb.conf.d/50-server.cnfbind-address = 0.0.0.0sudo systemctl restart mysql.service
sudo systemctl restart mariadb.service
sudo ufw allow from 192.168.1.5 to any port 3306
SELECT User, Host FROM mysql.user WHERE Host <> 'localhost';
วันพฤหัสบดีที่ 5 กรกฎาคม พ.ศ. 2561
ารติดตั้ง Fonts ภาษาไทยให้กับ Ubuntu
การติดตั้ง Fonts ภาษาไทยให้กับ Ubuntu 11.10 Server
ปัญหาที่เจอคือ Browser ไม่รองรับภาษาไทย คือ อ่านไม่รู้เรื่องดังรูป

การแก้ปัญหา
1. ทำการติดตั้ง Fonts ภาษาไทยด้วยแพ็คเกต xfonts-thai และ msttcorefonts ซึ่งเป็นแพ็คเกตที่รองรับ fonts ของMicrosoft โดยการใช้คำสั่งดังต่อไปนี้
$ sudo apt-get install xfonts-thai msttcorefonts ดังรูป


ยอมรับเงื่อนไขลิขสิทธิ์


การติดตั้งเสร็จสมบูรณ์

2. ทดสอบเข้าเว็ปไซต์เดิมใหม่อีกครั้ง ดังรูป

วันพุธที่ 13 มิถุนายน พ.ศ. 2561
ftp vsftp login incorrect 530 can't login
Hey there,
I just wanted to share a problem I had with my ftpdaemon with you and which I didn't find in this forum.
My ftp server always throw an error, trying to log in with new created ftp accounts. I'm not sure since when this error occurred, a user of mine pointed me on that issue. But I would say the Vestacp version is not essential in that case.
My ftp client acted as if I just entered wrong user data.
So I checked the vsftp logs in /var/log/vsftpd.log
Actually looked like wrong user data. But I entered them correctly.
I checked /etc/passwd and in the meantime I also googled a bit. So I found this article, which described exactly my problem.
https://github.com/serghey-rodin/vesta/issues/1437
New users got a different path to the "nologin" shell than before.
Initially it was /sbin/nologin. New users got the path to /usr/sbin/nologin
That path was not registered in /etc/shells.
Looked like this:
and I easily added this line
saved the file and everything worked fine again afterwards.
Cheers and have a nice Sunday!
I just wanted to share a problem I had with my ftpdaemon with you and which I didn't find in this forum.
My ftp server always throw an error, trying to log in with new created ftp accounts. I'm not sure since when this error occurred, a user of mine pointed me on that issue. But I would say the Vestacp version is not essential in that case.
My ftp client acted as if I just entered wrong user data.
CODE: SELECT ALL
Befehl:       USER ******
Antwort:     331 Please specify the password.
Befehl:       PASS *******
Antwort:     530 Login incorrect.
CODE: SELECT ALL
Sun Mar 25 12:04:01 2018 [pid 2] CONNECT: Client "87.123.193.139"
Sun Mar 25 12:04:04 2018 [pid 1] [*********] FAIL LOGIN: Client "87.123.193.139"I checked /etc/passwd and in the meantime I also googled a bit. So I found this article, which described exactly my problem.
https://github.com/serghey-rodin/vesta/issues/1437
New users got a different path to the "nologin" shell than before.
Initially it was /sbin/nologin. New users got the path to /usr/sbin/nologin
That path was not registered in /etc/shells.
CODE: SELECT ALL
nano /etc/shells
CODE: SELECT ALL
# /etc/shells: valid login shells
/bin/sh
/bin/dash
/bin/bash
/bin/rbash
/sbin/nologin
/usr/bin/rssh
/usr/bin/tmux
CODE: SELECT ALL
/usr/sbin/nologinCheers and have a nice Sunday!
/etc/init.d/vsftpd restartวันอังคารที่ 5 มิถุนายน พ.ศ. 2561
MikroTik ป้องกันการ Login ซ้อน
MikroTik ป้องกันการ Login ซ้อน
หลายท่านที่เป็น admin คงเคยเจออาการการ login ซ้อนกันมานะคัรบที่จะมีข้อความแจ้งเตือนว่า simultaneous session limit reached for user กันมาบ้างวันนี้ผมจะเอา script จาก MikroTik forum มาบอกเล่ากันคัรบ (https://forum.mikrotik.com/viewtopic.php?t=123434)

:local uname $user;
:local usercount 0;
:local usertime "00:00:00";
:local kickable;
:local maxuser 3;
:foreach i in=[/ip hotspot active find user=$uname] do= {
:local curup [/ip hotspot active get $i uptime];
:if ( $curup > $usertime ) do={
:set usertime $curup;
:set kickable $i;
}
:set usercount ($usercount+1);
}
:if ($usercount >= $maxuser) do={
:log info "Login user: $uname ($usercount/$maxuser) - Oldest $usertime will be logout!";
/ip hotspot active remove numbers=$kickable;
} else {
:log info "Login user: $uname ($usercount/$maxuser)";
}
จากตัวอย่างใน script เราจะต้องเอาไปวางไว้ในส่วนของ winbox => ip => hotspot => user profile แล้วตั้ง maxuser ให้ตามจำนวนที่ต้องการเช่นในตัวอย่างตั้ง 3 เพราะต้องการให้ login ได้ใช้งานแค่ 2 คนเท่านั่น

จากนั่นก็ไปแก้ที่ Shared Users ให้เท่ากับจำนวน maxuser ที่ใน script

เพียงเท่านี้เวลามีการ login ซ้อนเกิดขึ้นมา user แกสุดก็จะโดนเตะออกละคัรบ

:local uname $user;
:local usercount 0;
:local usertime "00:00:00";
:local kickable;
:local maxuser 3;
:foreach i in=[/ip hotspot active find user=$uname] do= {
:local curup [/ip hotspot active get $i uptime];
:if ( $curup > $usertime ) do={
:set usertime $curup;
:set kickable $i;
}
:set usercount ($usercount+1);
}
:if ($usercount >= $maxuser) do={
:log info "Login user: $uname ($usercount/$maxuser) - Oldest $usertime will be logout!";
/ip hotspot active remove numbers=$kickable;
} else {
:log info "Login user: $uname ($usercount/$maxuser)";
}
จากตัวอย่างใน script เราจะต้องเอาไปวางไว้ในส่วนของ winbox => ip => hotspot => user profile แล้วตั้ง maxuser ให้ตามจำนวนที่ต้องการเช่นในตัวอย่างตั้ง 3 เพราะต้องการให้ login ได้ใช้งานแค่ 2 คนเท่านั่น

จากนั่นก็ไปแก้ที่ Shared Users ให้เท่ากับจำนวน maxuser ที่ใน script

เพียงเท่านี้เวลามีการ login ซ้อนเกิดขึ้นมา user แกสุดก็จะโดนเตะออกละคัรบ
# base function Sourcecode: Mikrotik Forum# Local Variables Section:local uname $user;:local usercount 0;:local usertime "00:00:00";# Variable for user who is previously logged in:local kickable;# Variable for max session allowed, 2 means only one session is allowed at a time:local maxuser 2;# Load all active users in hotspot:foreach i in=[/ip hotspot active find user=$uname] do= {# Load UPTIME for all users to be matched later:local curup [/ip hotspot active get $i uptime];# If previous logged user is matched using UPTIME [above then 0] then set global variables for disconnection:if ( $curup > $usertime ) do={:set usertime $curup;:set kickable $i;}:set usercount ($usercount+1);}# IF Function for user who is already logged in,:if ($usercount >= $maxuser) do={:log info "Login user: $uname ($usercount/$maxuser) - Oldest $usertime will be logout!";# Kick previous logged users (if same ID)/ip hotspot active remove numbers=$kickable;# If not, do nothing, just log, You can modify this function as well / JZ} else {:log info "Login user: $uname ($usercount/$maxuser)";
สมัครสมาชิก:
บทความ (Atom)