วันอังคารที่ 5 มีนาคม พ.ศ. 2562

freeddns

:global AfraidUser "user_name"
:global AfraidPass "password"
:global WANInter "interface_name"
:global AfraidDomain "domain_name"

:global IpCurrent [/ip address get [find interface=$WANInter] address];
:for i from=( [:len $IpCurrent] - 1) to=0 do={ 
  :if ( [:pick $IpCurrent $i] = "/") do={ 
    :global NewIP [:pick $IpCurrent 0 $i];
    :if ([:resolve $AfraidDomain] != $NewIP) do={
      /tool fetch mode=http url="fetchable_URL_goes_here" keep-result=no
      :log info "Afraid.org Update: $AfraidDomain - $NewIP"
     } else={
     :log info "Afraid.org: don't need updates";
    }
   } 
}


http://freedns.afraid.org


วันจันทร์ที่ 3 ธันวาคม พ.ศ. 2561

Dynu Script mikrotik

# get the current IP address from the internet
/tool fetch mode=http address="checkip.dynu.com" src-path="/" 
dst-path="/dynu.checkip.html"
:local result [/file get dynu.checkip.html contents]

# parse the current IP result
:local resultLen [:len $result]
:local startLoc [:find $result ": " -1]
:set startLoc ($startLoc + 2)
:local currentIP [:pick $result $startLoc $resultLen]
:global ddnsuser your_Dynu_username
:global ddnspass "your_Dynu_password"
:global ddnshost "your_Dynu_hostname"
:global ipddns [:resolve $ddnshost];

#:global ipddns

:if ($ipddns != $currentIP) do={
:log info ("DynuDDNS: IP-Dynu = $ipddns")
:log info ("DynuDDNS: IP-Fresh = $currentIP")
:log info "DynuDDNS: Update IP needed, Sending UPDATE...!"
:global str "/nic/update?hostname=$ddnshost&myip=$currentIP"
:log info "currentIP is $currentIP"
/tool fetch address=api.dynu.com src-path=$str mode=http user=$ddnsuser password=$ddnspass 
dst-path=("/Dynu.".$ddnshost)
:delay 1
:global str [/file find name="Dynu.$ddnshost"];
/file remove $str
:global ipddns $currentIP
:log info "DynuDDNS: IP updated to $currentIP!"
} else={
:log info "DynuDDNS: No change needed";
}


/system script
add name=Dynu
policy=read,write,test
source=":global ddnsuser your_Dynu_username
:global ddnspass "your_Dynu_password"
:global theinterface "WAN_Interface_Name"
:global ddnshost "your_Dynu_hostname"
:global ipddns [:resolve $ddnshost];
:global ipfresh [ /ip address get [/ip address find interface=$theinterface ] address ]
:if ([ :typeof $ipfresh ] = nil ) do={
:log info ("DynuDDNS: No IP address on $theinterface .")
} else={
:for i from=( [:len $ipfresh] - 1) to=0 do={
:if ( [:pick $ipfresh $i] = "/") do={
:set ipfresh [:pick $ipfresh 0 $i];
}
}
:if ($ipddns != $ipfresh) do={
:log info ("DynuDDNS: IP-Dynu = $ipddns")
:log info ("DynuDDNS: IP-Fresh = $ipfresh")
:log info "DynuDDNS: Update IP needed, Sending UPDATE...!"
:global str "/nic/update?hostname=$ddnshost&myip=$ipfresh"
/tool fetch address=api.dynu.com src-path=$str mode=http user=$ddnsuser password=$ddnspass dst-path=("/Dynu.".$ddnshost)
:delay 1
:global str [/file find name="Dynu.$ddnshost"];
/file remove $str
:global ipddns $ipfresh
:log info "DynuDDNS: IP updated to $ipfresh!"
} else={
:log info "DynuDDNS: dont need changes";
} }"


/system scheduler add comment="Update Dynu DDNS" interval=5m name=ddns_sheduller \
on-event="/system script run Dynu\r\n" policy=read,write,test start-time=startup


///////////////work


# get the current IP address from the internet
/tool fetch mode=http address="checkip.dynu.com" src-path="/" dst-path="/dynu.checkip.html"
:local result [/file get dynu.checkip.html contents]

# parse the current IP result
:local resultLen [:len $result]
:local startLoc [:find $result ": " -1]
:set startLoc ($startLoc + 2)
:local currentIP [:pick $result $startLoc $resultLen]
:global ddnsuser "user"
:global ddnspass "pass"
:global ddnshost "host"
:global ipddns [:resolve $ddnshost];

#:global ipddns

:if ($ipddns != $currentIP) do={
:log info ("DynuDDNS: IP-Dynu = $ipddns")
:log info ("DynuDDNS: IP-Fresh = $currentIP")
:log info "DynuDDNS: Update IP needed, Sending UPDATE...!"
:global str "/nic/update?hostname=$ddnshost&myip=$currentIP"
:log info "currentIP is $currentIP"
/tool fetch address=api.dynu.com src-path=$str mode=http user=$ddnsuser password=$ddnspass dst-path=("/Dynu.".$ddnshost)
:delay 1
:global str [/file find name="Dynu.$ddnshost"];
/file remove $str
:global ipddns $currentIP
:log info "DynuDDNS: IP updated to $currentIP!"
} else={
:log info "DynuDDNS: No change needed";
}

วันอาทิตย์ที่ 2 ธันวาคม พ.ศ. 2561

change backup Vestacp

nano /usr/local/vesta/data/users/admin/user.conf แก้ admin เป็น user แล้ว หา backup = 3 เปลี่ยน เป็น 1

วันพฤหัสบดีที่ 8 พฤศจิกายน พ.ศ. 2561

NewHost php 7 config

PHP7
nano /etc/php/7.0/apache2/php.ini
date.timezone = "Asia/Bangkok"
max_execution_time = 3600
max_input_time = 360
max_input_vars = 2000
memory_limit = 1024M

Backup
nano /usr/local/vesta/data/users/admin/user.conf
แก้ admin เป็น user แล้ว หา backup = 3 เปลี่ยน เป็น 1

LDAP
extension=php_ldap.dll
apt-get install php7.0-ldap (or use apt-get install php7.1-ldap )
service apache2 restart

cd /home/admin/conf/web
nano apache2.conf
+nano sapache2.conf
php_admin_value open_basedir none
php_admin_value upload_tmp_dir none

วันจันทร์ที่ 5 พฤศจิกายน พ.ศ. 2561

Enabling SSH screenly Raspbeery

Enabling SSH

If you have installed via a newer NOOBS Installer SSH is disabled by default. To Enable it:
  1. Connect via the Console (CTRL + ALT + F1)
  2. Login using the default user name and password (pi'raspberry`)
  3. Execute sudo raspi-config
  4. Select Interfacing Options
  5. Navigate to and select SSH
  6. Choose Yes
  7. Select Ok
  8. Choose Finish
You should now be able to SSH into the Pi
It is highly recommended that you change the default password if you intend to connect your Pi to the outside world.

วันพุธที่ 17 ตุลาคม พ.ศ. 2561

How to Reset vCenter SSO password for the VCSA appliance


How to Reset vCenter SSO password for the VCSA appliance
To reset the vCenter SSO password, You need to remember the root credentials of the PSC or vCenter Server Appliance.
1.Login to Platform Services Controller or vCenter Server with Embedded Platform Services Controller Appliance using SSH as root user
2. Run this command to enable access the Bash shell:
shell.set --enabled true
3.Type shell and press Enter. Enter the below command
/usr/lib/vmware-vmdir/bin/vdcadmintool


4. Press 3 to choose the Reset Password option.  When prompted for the Account UPN, enter  User@vSphere_Domain_Name.local
In my case, it is administrator@vsphere.local.
If your vSphere Domain name is customized, provide the customized domain name. A random password will be generated for the VCenter SSO admin account.
5.  Log in to vSphere Web Client using the vCenter SSO admin account with the generated password. Select the Change Password option under the logged in Username


vcenter 6.0 reset password

Enable SSH on vCenter Server Appliance 6 (VCSA)

If you’re running the Appliance version of vCenter 6 at some stage you may want console access via SSH.  When you install VCSA 6 for the first time you have the option during installation to enable SSH.  Depending on your security stance you may have left SSH off and now you want it on.
There are a few different methods for enabling SSH on VCSA.  The below two methods both use the web client.
Method 1.
Directly enabling SSH in the Web Client.
This method is probably the easiest and quickest way.  The settings just happen to be in a non-intuitive location.
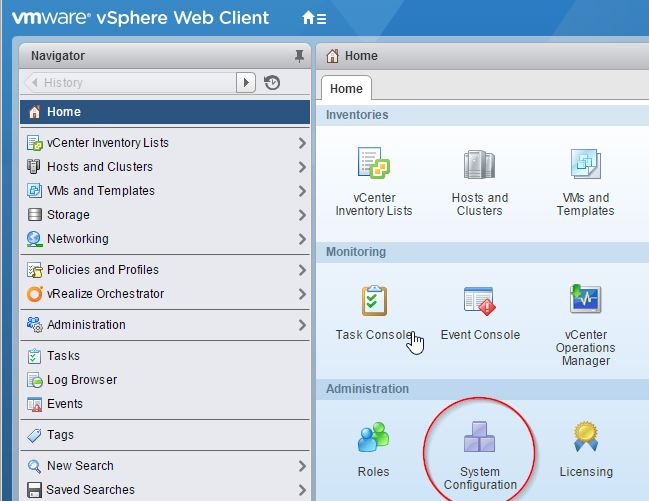
On the Home screen of the Web Client select Administration -> System Configuration
enable_ssh-000182
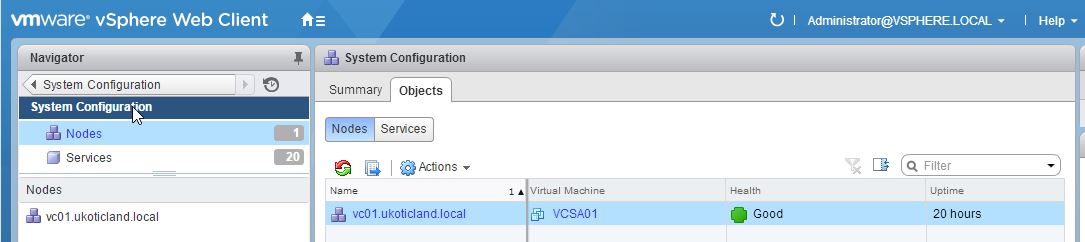
Select Nodes and right click on your vCenter server.
enable_ssh-000179
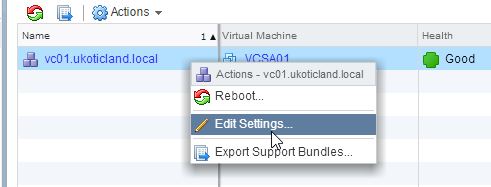
Select Edit Settings
enable_ssh-000181
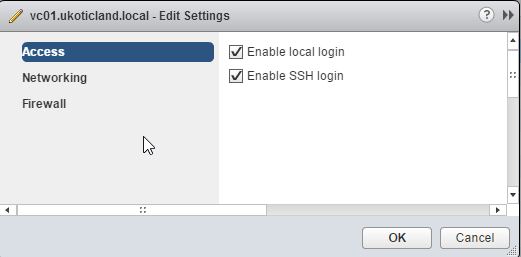
Select the Checkbox Enable SSH login
enable_ssh-000180
Click OK.
You should now be able to SSH to the vCenter name or IP.

Method 2.
Enabling SSH via the Remote Console.
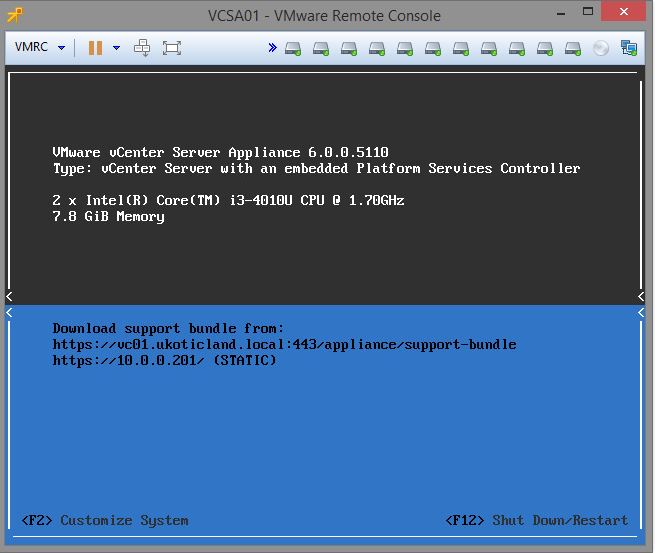
Navigate to your vCenter Appliance VM.  Click on Launch Remote Console.
enable_ssh-000184
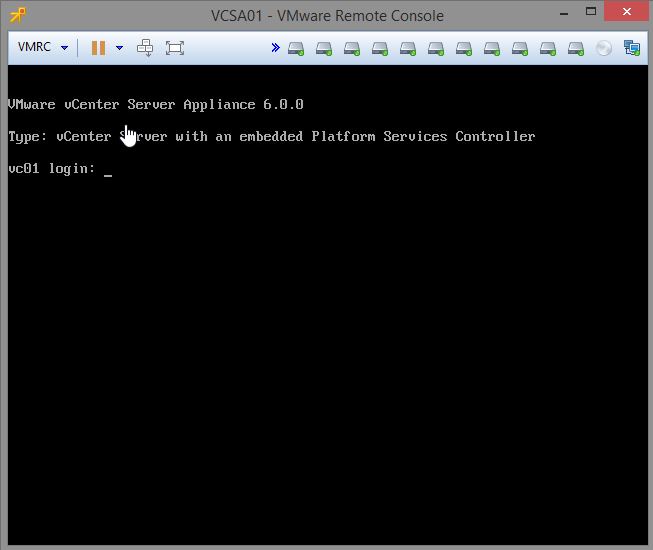
Press ALT + F1 to get a login TTY session and login as root
enable_ssh-000183
Run the below commands to enable SSH.  ssh.get shows the current status.  ssh.set allows you to change the state of SSH.  Use ‘false’ instead of true to disable SSH.
Command> ssh.get
Enabled: False
Command> ssh.set --enabled true
Command> ssh.get
Enabled: True
Command>
The above methods takes effect immediately, no need to reboot.  When disabling SSH, current sessions stay active and don’t end.  So if someone has an open SSH session they won’t be kicked out until they logoff or their session times out.